
This page is to document the work and modifications that have gone into my Red Jeep JK Sahara Unlimited. I previously did a similar page for a 07 Jeep JK Unlimited which was written off. Since after the accident I was able to buy the vehicle back from insurance I was able to preserve almost all of my previous modifications and aftermarket parts. The only things I was not able to save were a few lights and the heated seats, all other parts which were better on the green Jeep came off and found their way on the the red Jeep. Please see the Blog and the page on the Green Jeep for more detailed modifications.
Comprehensive Running List of Modifications (no specific order)
Performance Upgrades
- 4.56 Gears w/Rear LSD
- AEV 2.5 Dualsport XT Lift w/Geometry correction
- BFG KO2s 34x10.5 R17 (Summer)
- JKS Sway Bar Disconnects
- OME Steering Stabilizer
- ARB 12v Compressor (for airing up)
Exterior Upgrades
- ARB Deluxe Bullbar
- Warn VR-10000 Winch
- Teraflex HD Hinge and Tire Carrier
- Rancho Diff covers
- Rubicon Sliders with custom tubes
- Custom built spare tire carrier rack
- BOLT Hoodlock
- TMR Delrin door hinge liners
- Rugged Ridge Hood Latches
- Kargo Master Congo Cage w/ Yakima crossbars
Electrical Upgrades
- REDARC BCDC, DC-DC Battery Charger
- Rugged Ridge Dual Battery Tray
- 2x Motomaster Group 34 AGM
Lighting
- Cibie Eurospec Headlights w/KC wiring harness adapter and Philips +130 H4 Bulbs
- 9" LED Offroad lights (5w LEDs)
- LED lights in rear bumper
- Rock lights
- Underhood LED Lights
- Vision X Headlight and foglight protective film
Interior
- Bestop underseat locking storage
- Custom overhead switch pod w/ wiring and underhood fuse/relay box
- Daystar dash panel with ram mounting points and tablet mount
- Custom Built rear cargo shelf w/quikfist mounts
- Custom Built tailgate table
- Rear interior lighting
- Custom built rear fridge slide
- Dometic CFX-50 Fridge
- Rear seat overhead 'attic'
- Custom made paracord grab handles
- Rear seat cover for dog
- Aftermarket heated seats
- Rightline Gear Bags
Communications
- Yaesu FTM-400XDR w/ mic extension
- Comet SBB-5 antenna
Not Currently in Use
- Hypertech Max Energy Programmer
- 285/70 R17 Cooper Discoverer A/Tw (Winter Tires)
So when I first took possession of the Jeep the first thing I did was spend some time just fixing and cleaning it up since it needed a little TCL. You can read more in the blog but basically I had to replace the intake manifold gasket, and spent some time freshening up the paint from years of neglect.
There were a few other details that needed attention as well, plus I took the opportunity to make a few improvements at the same time.

I grabbed new brake pads and rotors all round, new e-brake shoes, and then ordered a headlight upgrade (more later in the page).


Seeing as the Jeep had about 150k km, it was time that the suspension got refreshed. I ordered up the AEV 2.5 Dualsport lift after doing extensive research. With this I also ordered the optional geometry correction brackets which I hear make a big impact on the 3.5 and 4.5 inch lifts but also offer a slight improvement for the lower lift as well. Since the goal was to keep this Jeep practical for long on-road trips, camping, and towing this setup was a no brainer. Although there is always the internal struggle because for the money you could buy a much more aggressive, 'impressive', lift.

Since I recently had the axles regeared in the green Jeep I wanted to swap them over. This meant pulling both Jeeps into the garage and getting them well supported. It was then a matter of dropping the axles and switching which vehicle they were attached to.

Since the lift was going into the Red Jeep we took the opportunity to install the extended bump stops and bracketry as well as slap a coat of paint to freshen up and protect the housings.

Front axel going back in.

And another view.

Next up was the suspension, here are a few comparison pictures of the new vs old pictures. Notice how the new springs are considerably heavier duty and slightly longer.


Back end installed

Jeep back on the ground! Bumper and winch also installed.
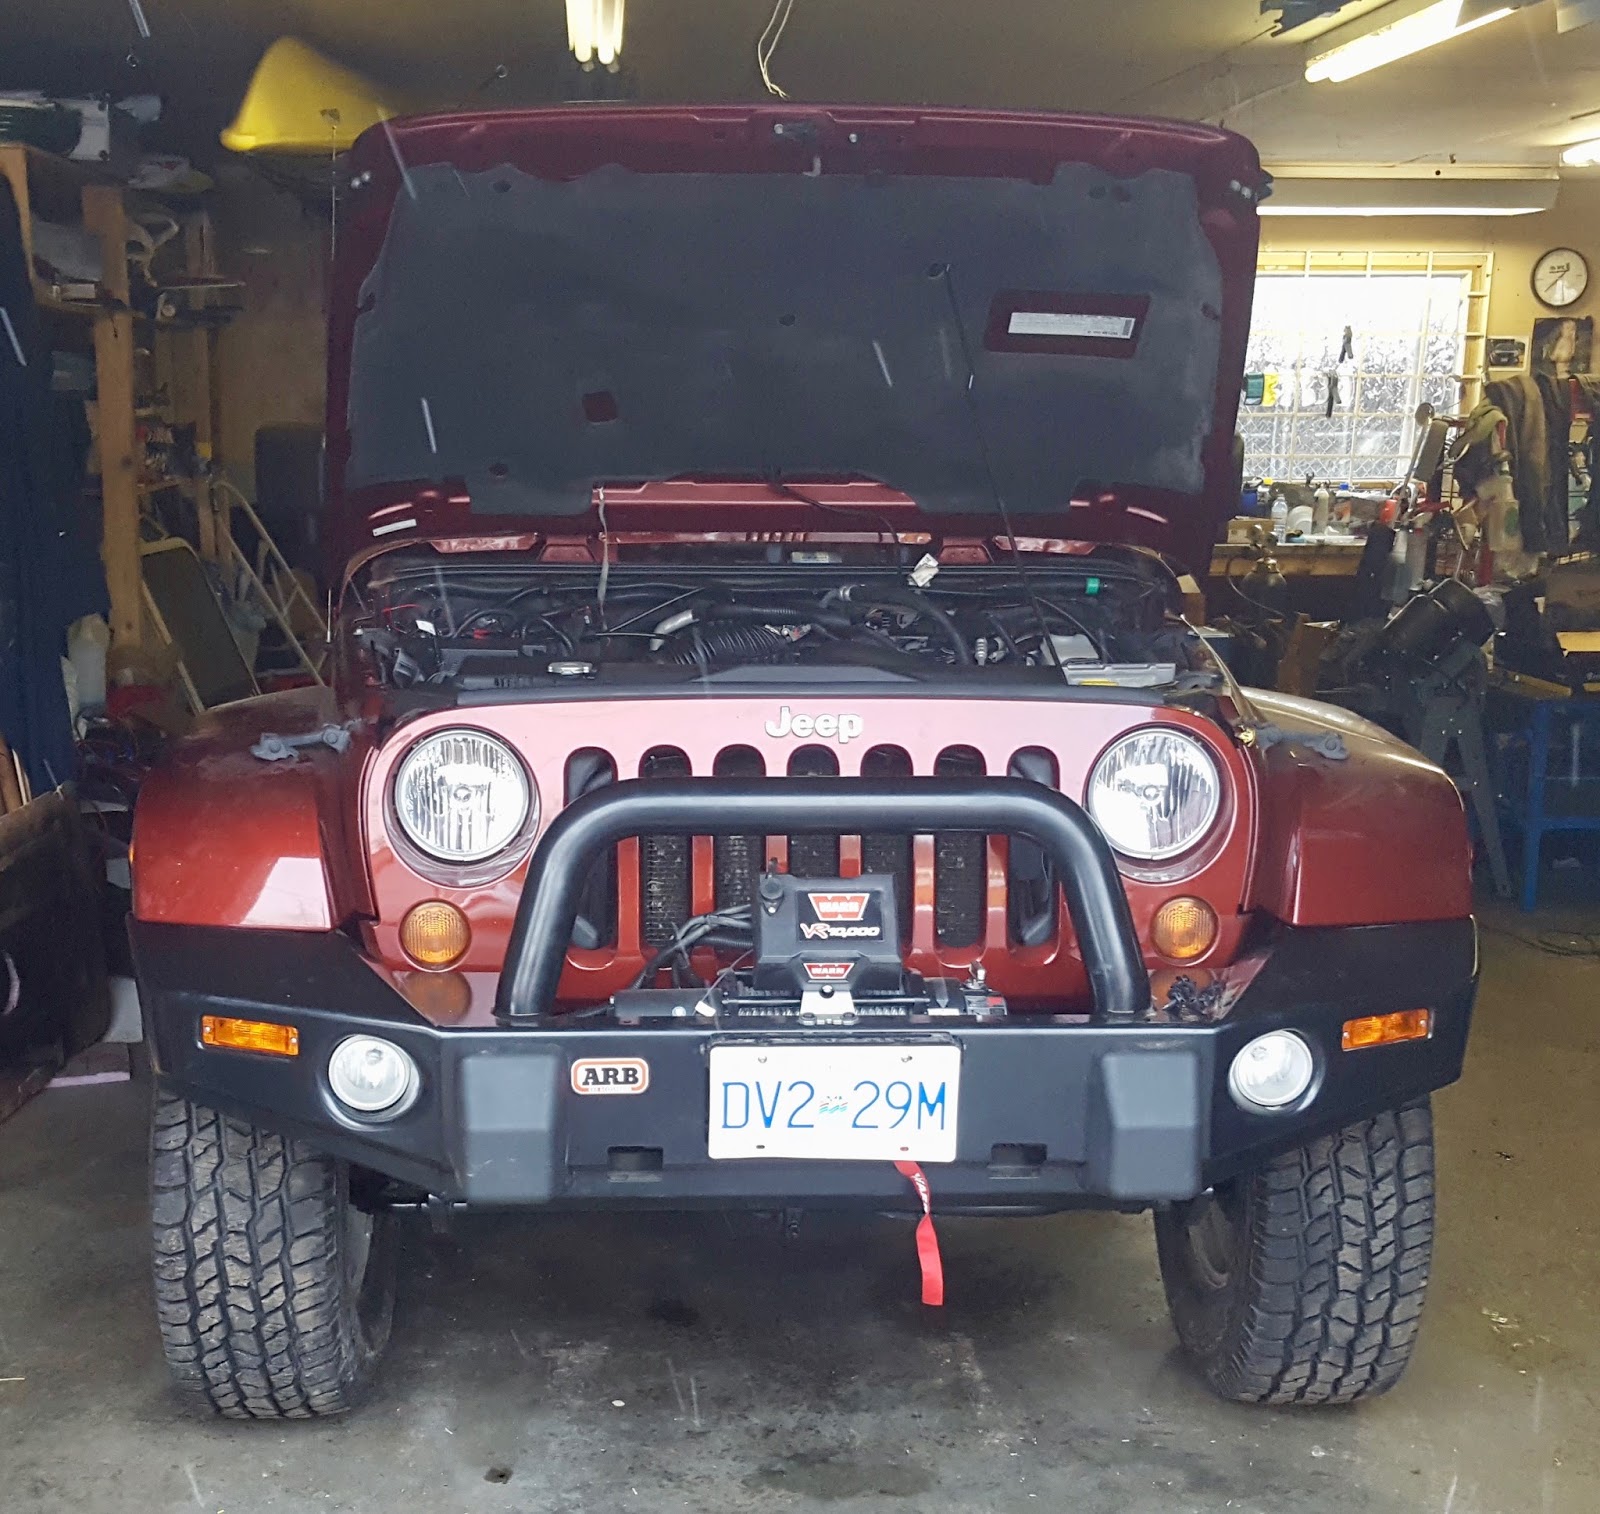
View from the front. Still happy with the look of the bumper.

Here are the new headlights mentioned above. My last Jeep had the stock headlights and they are barely more than adequate. My dad had previously done a lot of research on the best replacement lights and bought these Cibie housings for himself, the reality of it is for the price they are hard to beat. Ideally it would have been awesome to go LED, but they are far more expensive especially if you get heated ones which are important to winters in BC.
Being that the new housings are glass I also wanted to protect them from rocks and sandblasting so I ordered some Lamin-X film.

These housings are a European spec, which is still legal in BC. There is a lot of good information online about them. They have a fairly defined horizontal cutoff and throw light up to the right hand shoulder. These lights to require different bulbs and as such an wiring adapter.

Here is a housing after the Lamin-X has been installed.
 Stock Lights
Cibie housing with Philips +130 Bulbs

My main criticisms of these lights are, that I am not a huge fan of the look of the housing compared to stock. Also unlike the stock lights which just provide a fill of light, these beams are much more structured and you can see some artifacts of light dispersion from the way the light is diffused, these also leaves a bit of a gap between where the 2 beams converge in the middle along the cutoff.

While the headlights were out I also added some plastic gutter guard to the grill for projectile protection for the radiator and AC condenser.

Looks similar to the metal lath that was int the green jeep but didn't need to be painted and was easier to work with.

The new Jeep and the old one. The Green jeep has been put back together just well enough to sell.

At the front of the Jeep part of the suspension refresh I opted to replace the steering stabilizer, for this I chose to go with Old Man Emu an ARB Brand and one that I trust on the Jeep. Honestly there was really no need to do this and the stabilizer does very little if the rest of your steering/suspension is in good working order. As expected there was no real change to the driving feel, but I do like that it is relocated higher up on top of the tie rod.

If you've looked at the blog you will have seen the extensive damage to the rear that wrote off the Jeep and how the impact all came through the tailgate. I was however able to still salvage the tailgate table which got damaged but was easily repairable. Once it was fixed up I reinstalled in the new Jeep. Note the custom subwoofer brackets since I had to relocate the sub a couple inches forward to clear. To see the homemade tailgate table in action go to the link here.

The day had come and I had found a buyer for the Jeep. I was happy that it was going to a good home to someone who planned on getting it back on the road. I had bought the Jeep from insurance for $4200 which was a no brainer since there was $6000 in parts within 3 months PLUS several thousand more that I would have to repurchase for a new vehicle. I ended up selling the Jeep for $4500 which left me with a $300 profit on top of all my parts.

Also included in my order from Lamin-X was some yellow for my fog lights. Honestly the fogs don't have the same impact on lighting the road as they did with the poor stock headlights so I wasn't hindering performance by adding the yellow film. This would add protection, a neat appearance, and also supposedly better vision in inclement weather.
Since I just bought the film in sheets (not pre-cut) I had to find a template to cut out my circle. Turns out my camping cups worked just perfectly.

Comparison before and after the film.

Front end shot.

By this point the snow was starting to melt and I was able to start some local exploring again.

With the swaybar disconnected and the new suspension the flex was markedly improved

In an effort to further build the Jeep for serious overlanding and trips I decided to find out what they hype was about and pickup a true 12v fridge.

I built a tray for the fridge since I needed it to slide out from under my shelf. I built the tray out of aluminum and used some double locking 400lb drawer slides.

Tray mounted. If I find more pictures I may make a post on this. Since I wanted it securely bolted it in took a lot of effort to build the mounts since the floor has so many contours and mounting options are limited.

Drawer installed.

Fridge in slide, overall I am extremely happy. The drawer is stout and rattle free. Its not a cheap addition to the rig but its so nice to have consistently cold food indefinitely with no melted ice.

On the Green Jeep I had added some 50w fog lights for use as rock and backup lights. Having auxiliary reverse lights is damn near a necessity. I've seen lots of setups using the flush mount square LEDs in the middle section of the rear bumpers which looks good, however I feel the light placement isn't optimal for reversing using the mirrors, especially if using a trailer. I found some cheap flush mounted LEDs on Amazon and decided to put them in the corners of the bumper to illuminate both behind but also where you might be turning into. Because of their placement they also help out when backing up the trailer, if for nothing else to see how the trailer is reacting to steering input.
I've wired these up on a switch which requires ignition to be on but in no way connected to the backup circuit.
 Creating the template and cutting the hole
Had to create custom washers so the lights couldn't be pulled out. 


A small modification I had done previously, which is done to prevent damage to the Jeep is the addition of some foam tape along the top of the slider. This prevents rocks from getting in wedging themselves between the rocker and slider. I also suggest taking off the sliders at least once a year to clean out the gap, as well as to keep the threads in good shape.

One mod I was really missing was underhood lights. These are so handy to see the compressor at night, or for checking the oil. They can even take the place of a trouble light when working on the Jeep.


I also added back some rock lights, this time using all LEDs, in the front I used 2 of the ones pictured above which are very inexpensive on amazon. For the rear I used a couple narrower lights, which I had laying around. These were much more expensive but I am happier with the light dispersion and color. I don't typically wheel hard at night, but I'd like to do more, the main reason I like this modification is for visibility when I am airing up on at night.

Last but far from least I added back lights to the rear of the Jeep. I added 2 circuits, one for the cargo area directly with 1 row of LEDs across the top back of the hardtop, and another 2 strips under the cargo shelf. The second circuit is for a strip adhered to the tailgate glass. Both of these have constant power and are switched from a couple Carling rockers cut into the sub housing. These come in super handy especially when making camp.

Something else I've had made up since the last post is some decals for my public Instagram, if you haven't already please check it out.
No comments:
Post a Comment